sandywp / plugins / contact-form-7-mailchimp-extension

Connect Contact Form 7 to Mailchimp, Brevo, MailerLite & Klaviyo
CF7 Mailchimp integration: send Contact Form 7 leads and signup forms to your Mailchimp audience, or to Brevo, MailerLite, and Klaviyo lists.
Ready in seconds.
v0.9.81.09 40,000+ installs WP 6.4+ PHP 7.4+
What you get inside
2 screens-
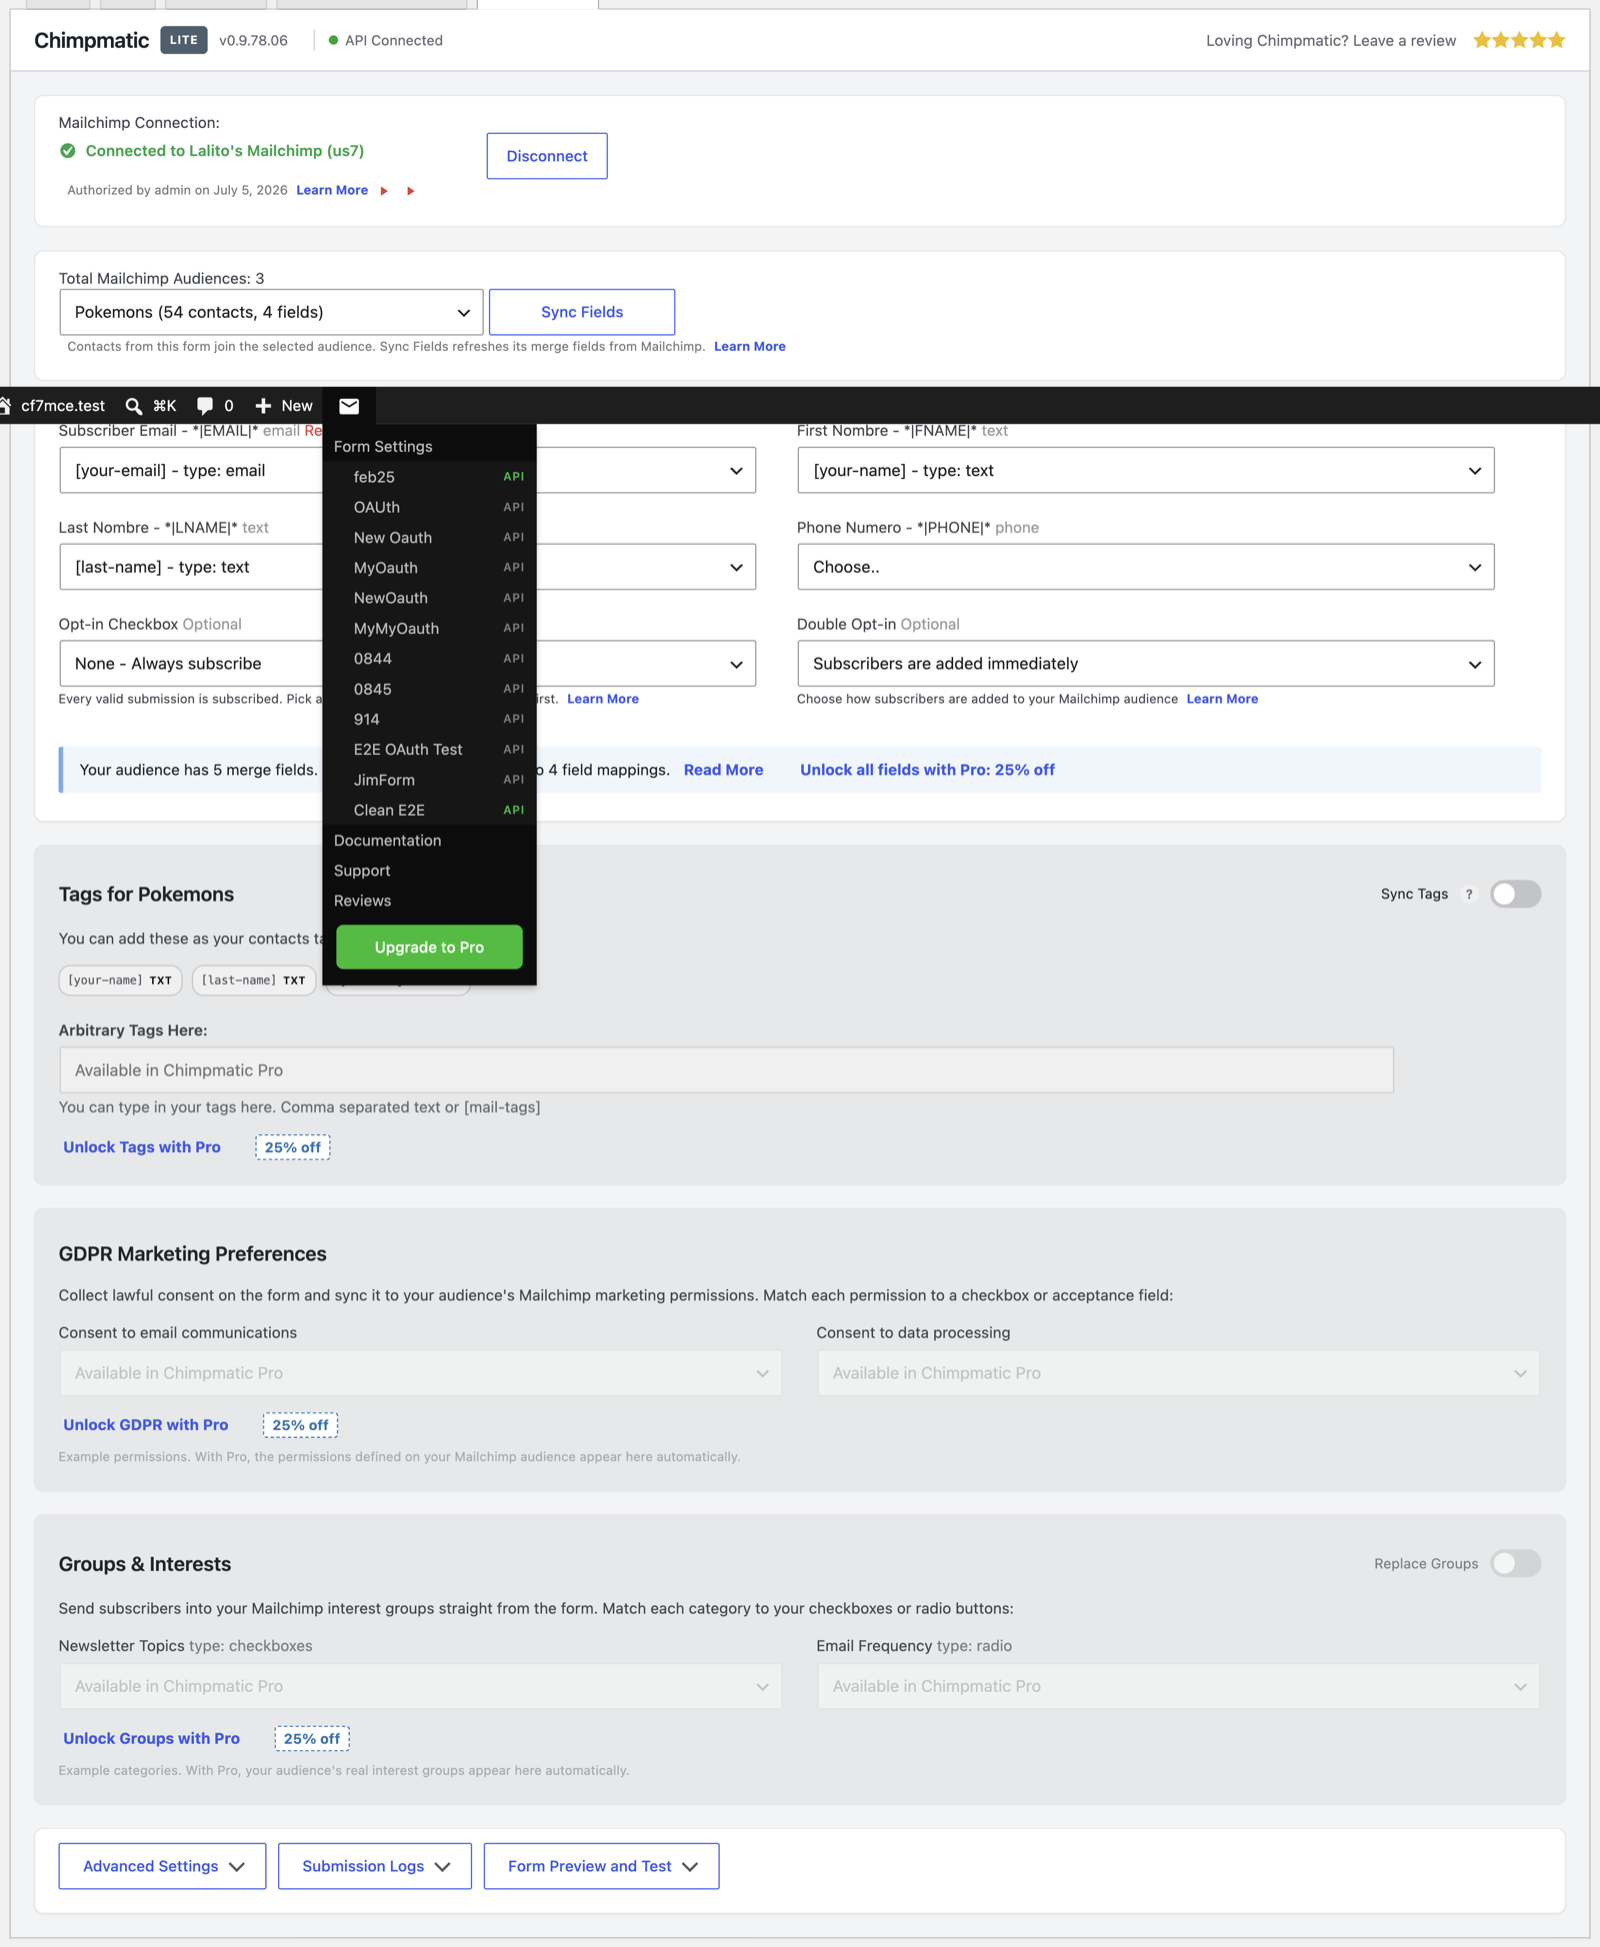
Choose Mailchimp, Brevo, MailerLite, or Klaviyo inside a Contact Form 7 form.
-
Select an audience, list, or group and map Contact Form 7 fields to subscriber fields.
About this plugin
A Mailchimp integration for Contact Form 7 that also connects forms to Brevo, MailerLite, and Klaviyo. Send form submissions to email marketing lists, audiences, or groups without replacing Contact Form 7 or adding a separate automation platform.
Choose a provider for each form, connect the account, select a destination, and map Contact Form 7 fields to subscriber fields. Existing Mailchimp forms keep their saved audience, field mappings, credentials, and opt-in settings after upgrading.
New to this? Start with the basic setup walkthrough, or read the 2026 guide to Contact Form 7 and Mailchimp automation.
Contact Form 7 Email Marketing Integrations
Choose one provider independently for each Contact Form 7 form. Each integration sends submitted subscriber data directly to the audience, list, or group selected in that form’s settings.
Mailchimp integration for Contact Form 7 – Connect through one-click OAuth or an API key, choose an audience, map merge fields, and select single or double opt-in. Read the Mailchimp setup guide.
Brevo integration for Contact Form 7 – Connect with a Brevo API key, choose a list, map contact attributes, and select direct subscription or a Brevo confirmation email. Read the Brevo setup guide.
MailerLite integration for Contact Form 7 – Connect with a MailerLite API token, choose a group, and map subscriber fields. Double opt-in follows the MailerLite account setting. Read the MailerLite setup guide.
Klaviyo integration for Contact Form 7 – Connect with a Klaviyo private API key, choose a list, and map profile properties. Confirmation behavior follows the selected Klaviyo list. Read the Klaviyo setup guide.
Everything included
- Choose Mailchimp, Brevo, MailerLite, or Klaviyo independently for each Contact Form 7 form.
- Use different provider accounts and destinations on different forms.
- Load audiences, lists, or groups inside the Contact Form 7 editor.
- Map the required email address and up to four additional Contact Form 7 fields.
- Require an opt-in checkbox before subscriber data is sent.
- Control or respect provider-specific confirmation behavior.
- Keep existing Mailchimp configurations working after upgrading.
- Use unlimited Contact Form 7 forms.
Built for Contact Form 7
ChimpMatic adds a focused integration panel to each Contact Form 7 form. It does not replace your forms, introduce another form builder, or require a generic automation service between WordPress and your email provider.
Wondering how this compares to the alternatives? We set out the trade-offs in our Mailchimp plugin comparison and our marketing automation comparison.
ChimpMatic Pro
ChimpMatic Pro is an optional add-on for teams that need advanced provider features, expanded field mapping, advanced consent controls, subscriber tagging, and priority support. ChimpMatic Lite remains a complete Contact Form 7 integration on its own.
Compare ChimpMatic Lite and Pro · Pricing · Installing Pro
External Services and Data Disclosure
ChimpMatic is independently developed and is not affiliated with or endorsed by Mailchimp, Brevo, MailerLite, or Klaviyo. When a configured form is submitted, its email address, mapped fields, destination, and consent choice are sent directly to the provider you selected; an account with that provider is required. Full detail is in our external services disclosure and privacy policy.
Support
Questions
- Which email marketing providers does ChimpMatic Lite support?
Version 0.9.81.09 supports Mailchimp, Brevo, MailerLite, and Klaviyo. You select one provider independently for each Contact Form 7 form. See the integrations overview.
- How do I connect Mailchimp to Contact Form 7?
Open the ChimpMatic tab in the Contact Form 7 editor, select Mailchimp, connect with OAuth or an API key, choose an audience, and map the form’s email field. You can then configure consent and single or double opt-in. Follow the Mailchimp setup guide.
- How do I connect Brevo to Contact Form 7?
Open the ChimpMatic tab, select Brevo, enter a Brevo API key, choose a list, and map the form fields to Brevo contact attributes. You can subscribe the contact directly or use a Brevo confirmation email. Follow the Brevo setup guide, or read more about the Contact Form 7 Brevo integration.
- Can Contact Form 7 send subscribers to MailerLite?
Yes. Select MailerLite in the ChimpMatic tab, connect with an API token, choose a group, and map the Contact Form 7 email field and subscriber fields. MailerLite applies the account’s API double-opt-in setting. Follow the MailerLite setup guide.
- Can Contact Form 7 send leads to Klaviyo?
Yes. Select Klaviyo in the ChimpMatic tab, connect with a private API key, choose a list, and map Contact Form 7 fields to Klaviyo profile properties. Consent behavior follows the selected Klaviyo list. Follow the Klaviyo setup guide.
- My form submits but nothing reaches Mailchimp. What do I check?
Usually it is the audience selection, a required merge field that is not mapped, or an opt-in checkbox that was never ticked. We walk through the seven most common causes.
- Will my existing Mailchimp forms keep working?
Yes. Existing configurations default to Mailchimp and retain their saved audience, field mappings, API credentials, and opt-in behavior.
- Can different forms use different providers?
Yes. A newsletter form can send to MailerLite while a lead form sends to Brevo, for example. Every form stores its own provider, credentials, destination, mappings, and opt-in configuration. The same applies to multiple Mailchimp audiences.
sandywp / also on the shelf
Try another plugin

Brevo – Email, SMS, Web Push, Chat, and more.
4.1 · 100K+ installs
Turn your WordPress site into a marketing powerhouse. Grow your audience, boost engagement, and drive more sales with Brevo.

Integration for Elementor forms – Sendinblue
4.8 · 7K+ installs
Connect your Elementor Pro forms to Sendinblue/Brevo to easily capture and manage contacts from your website.

Add-on Brevo for Gravity Forms
4.8 · 1K+ installs
Connect Gravity Forms to Brevo (Sendinblue). Sync form fields with Brevo attributes and automatically generate contacts in…
Spin up a real WordPress site in seconds.
Test plugins, build a demo, hand a client a link — then squash it and start again. No local setup, no Docker.